This guide outlines the procedure for integrating Microsoft Entra ID (formerly Azure Active Directory) user data into ReadyWorks using SQL ETL mappings. The objective is to normalize and transform Entra user data into the ReadyWorks target schema.
📌 Prerequisites
Before beginning, ensure the following:
-
You have the ReadyWorks Data Mapping module enabled
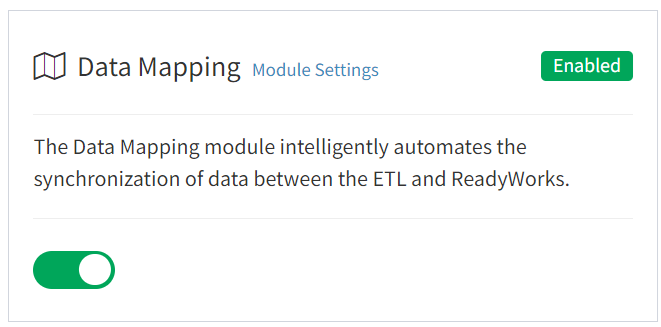
- You have the appropriate privileges to configure Data Mappings.
- You are working within a ReadyWorks tenant where the Entra ETL Connector is configured
- There is data in the Entra Staging Tables with familiar information about Users in your organization and their associated attributes (e.g., displayName, jobTitle, etc.).
- You are familiar with the naming conventions and standards used within your organization
🧭 Process Overview
- Access the Data Mapping Module
- Create or Edit the ETL Mapping
- Write the SQL Query to Transform Entra Data
- Map Source Columns to ReadyWorks Fields
- Preview Output and Troubleshoot Errors
- Save and Commit the Mapping
- Verify Output in the ReadyWorks Asset Table
- Perform Reprocessing or Manual Adjustments as Needed
🧩 Step-by-Step Instructions
Step 1: Access the Data Mapping Module
- Log in to ReadyWorks.
-
From the left-side menu, go to:
- Configuration > Module Settings > Data Mapping
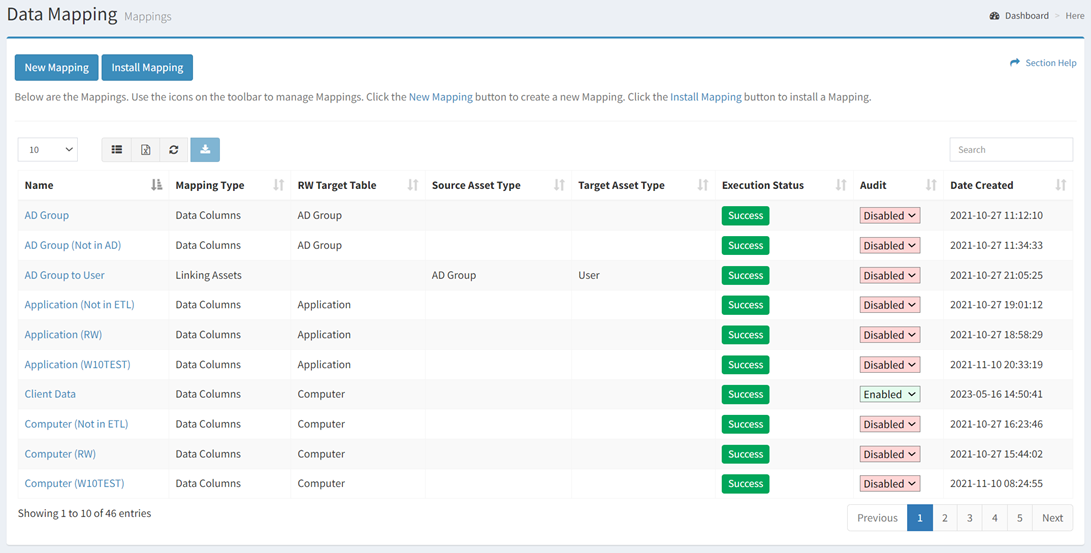
- Click on the existing mapping (e.g., AD Users) or create a new one.
Step 2: Create or Edit the Mapping
- Mapping Name: Set to Users. This table must be your master record of Users in the organization and is required for appropriate working of the Self-Service Portal.
- Target Table: Select User.
- Mapping Type: Set to Data Mapping.
- In the ETL Connector dropdown, select your Entra source (e.g., Azure Active Directory).
Step 3: Compose the SQL Transformation Query
Write a SQL SELECT statement that:
- Pulls relevant user fields from the staging table.
- Applies transformations to match ReadyWorks schema.
- Ensures normalization (e.g., truncating long values, deriving domain from UPN, joining to manager details).
Example SQL Snippet:
SELECT
  CONCAT(COALESCE(usr.displayName, ''), ' (', usr.mailNickname, ')') AS name,
  usr.displayName AS display_name,
  usr.mail AS email,
  SUBSTRING_INDEX(usr.userPrincipalName, '@', -1) AS domain,
  usr.officeLocation AS office_location,
  usr.department AS department,
  usr.jobTitle AS job_title,
  addr.streetAddress AS street_address,
  addr.city AS city,
  addr.state AS state,
  addr.postalCode AS zipcode,
  STR_TO_DATE(usr.passwordLastSet, '%Y-%m-%dT%H:%i:%sZ') AS password_last_changed,
  SUBSTRING(usr.manager, 0, LENGTH(SUBSTRING_INDEX(usr.manager, '/', -1)) - 2) AS manager_upn
FROM staging_entra_users usr
LEFT JOIN staging_entra_addresses addr ON addr.objectId = usr.objectId
LEFT JOIN staging_entra_users mgr ON mgr.userPrincipalName = SUBSTRING_INDEX(usr.manager, '/', -1)
WHERE usr.accountEnabled = TRUE;
Adjust field names based on your actual staging schema.
Ensure all Entra attributes you wish to ingest are present in the connector output.
Step 4: Map Columns to ReadyWorks Target Fields
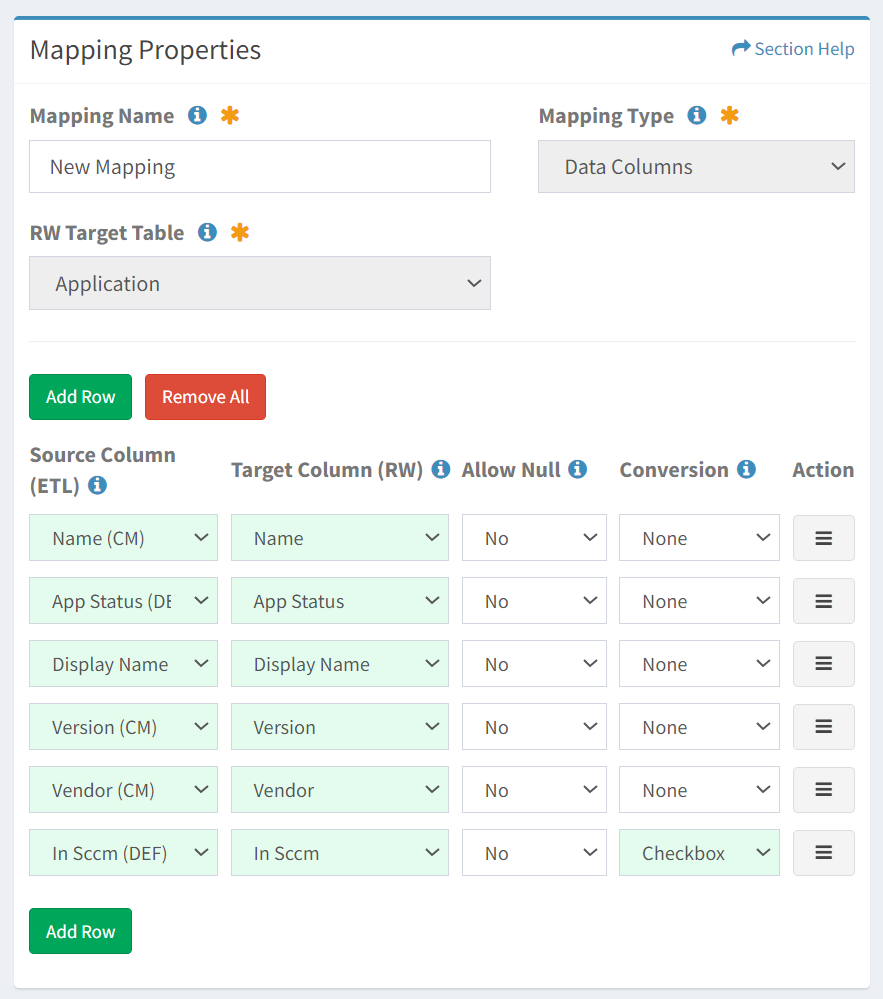
In the Mapping Properties Panel:
- For each field from your SQL query, click Add Row.
-
Assign:
- Source Column (ETL): Name used in SQL output (e.g., display_name).
- Target Column (RW): Field in ReadyWorks User table (e.g., Display Name).
- Set Allow Null/Zero and Conversion as required.
|
Source Column |
Target Column |
|
display_name |
Display Name |
|
|
|
|
domain |
Domain |
|
office_location |
Office Location |
|
job_title |
Job Title |
|
department |
Department |
|
street_address |
Street Address |
|
city |
City |
|
state |
State |
|
zipcode |
Zipcode |
|
password_last_changed |
Last Password Change |
|
manager_upn |
Manager (Alias) |
Step 5: Preview and Validate Output
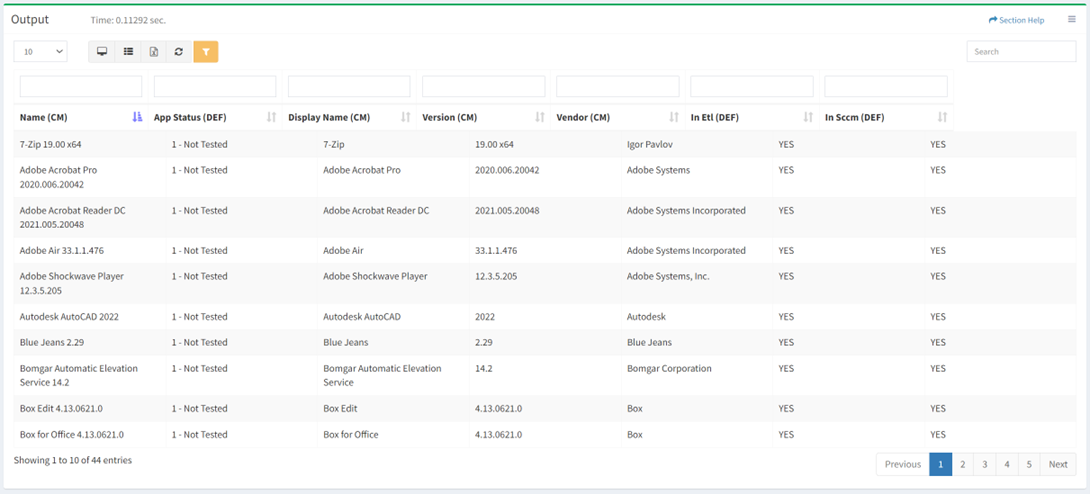
- Scroll down to the Output panel.
- Click Run (green play button).
-
Inspect the output for:
- Null values
- Incorrect data types
- Invalid joins
- Adjust the SQL as needed to resolve issues.
Step 6: Save the Mapping
- Click Disk icon to save.

- Wait for the “Mapping updated successfully” notification.
- Optionally: export a copy of the SQL for documentation or reuse.
Step 7: Confirm Data in ReadyWorks
- Navigate to User Table in ReadyWorks from the Left Hand sidebar.
-
Confirm that values now appear as expected, including:
- Normalized Display Name
- Populated manager references
- Accurate password last changed dates
Step 8: Post-Mapping Actions
If data appears incorrect or outdated:
- Confirm that the Entra ETL Connector has run successfully (check ETL Dashboard).
- Optionally, run a truncate and reprocess job if bad data must be purged (requires admin access and caution).
⚠️ Common Pitfalls
- Case Sensitivity: SQL column names in ReadyWorks may be case-sensitive in some configurations.
- Truncation Errors: ReadyWorks will truncate values if columns exceed expected length—always apply SUBSTRING if needed.
- Staging Table Not Found: Validate that connector output matches expected staging table names in SQL.
- Join Failures: Make sure UPNs or object IDs are present and not null in both parent and child records.
✅ Summary
Data Mapping any source data into ReadyWorks involves:
- Authoring a normalized SQL query.
- Aligning data fields with ReadyWorks schema.
- Validating the output.
- Saving and monitoring for data consistency.
Once configured properly, this mapping ensures that your ReadyWorks user records reflect the most accurate, up-to-date identity data from Microsoft Entra, supporting analytics, lifecycle tasks, and automation downstream.